How do I use the learning mode on my charging station?
For one hour, your charge point in Learning mode registers every RFID card or badge you hold against it and adds it to your account as a charge card. This is handy for adding the cards of all your employees, residents or vehicles in one go, without typing in their codes.
What you need
- A charge point that is connected to Wattify: in the Charge points list it is marked Online.
- A car you can plug into the charge point. Without a car plugged in, the charge point goes into standby and does not read any cards.
- The cards you want to add.
Step 1: turn on learning mode
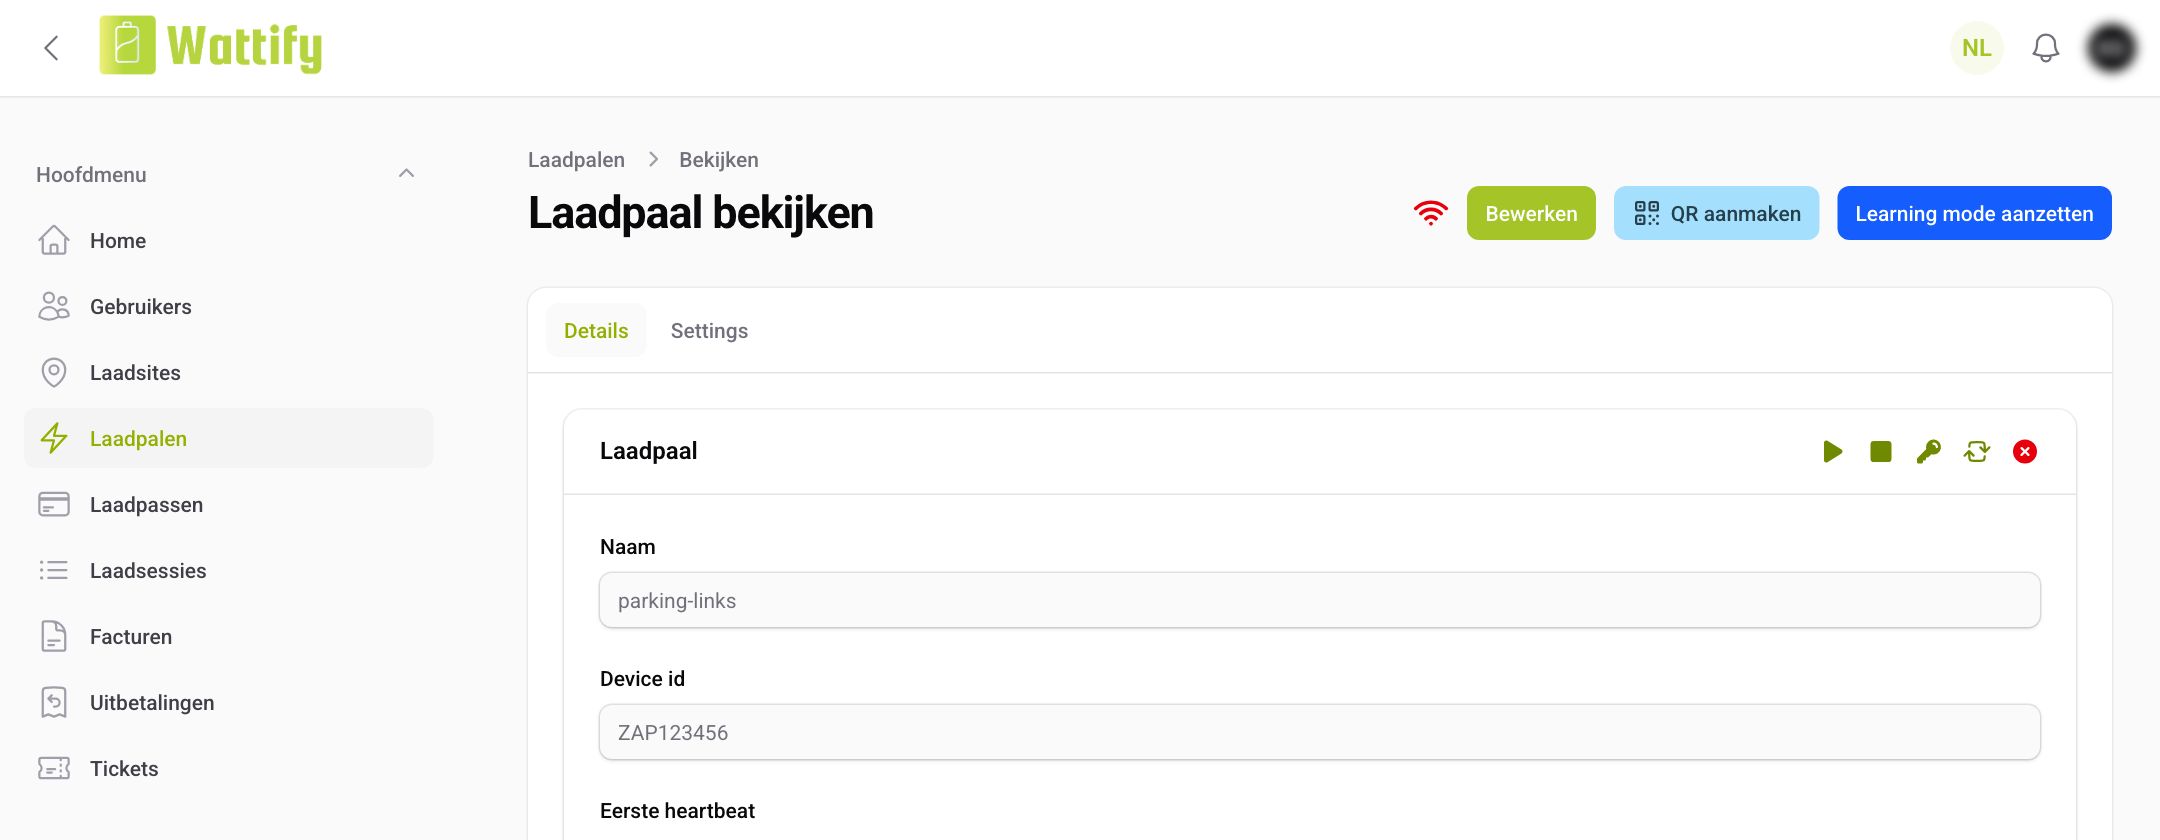
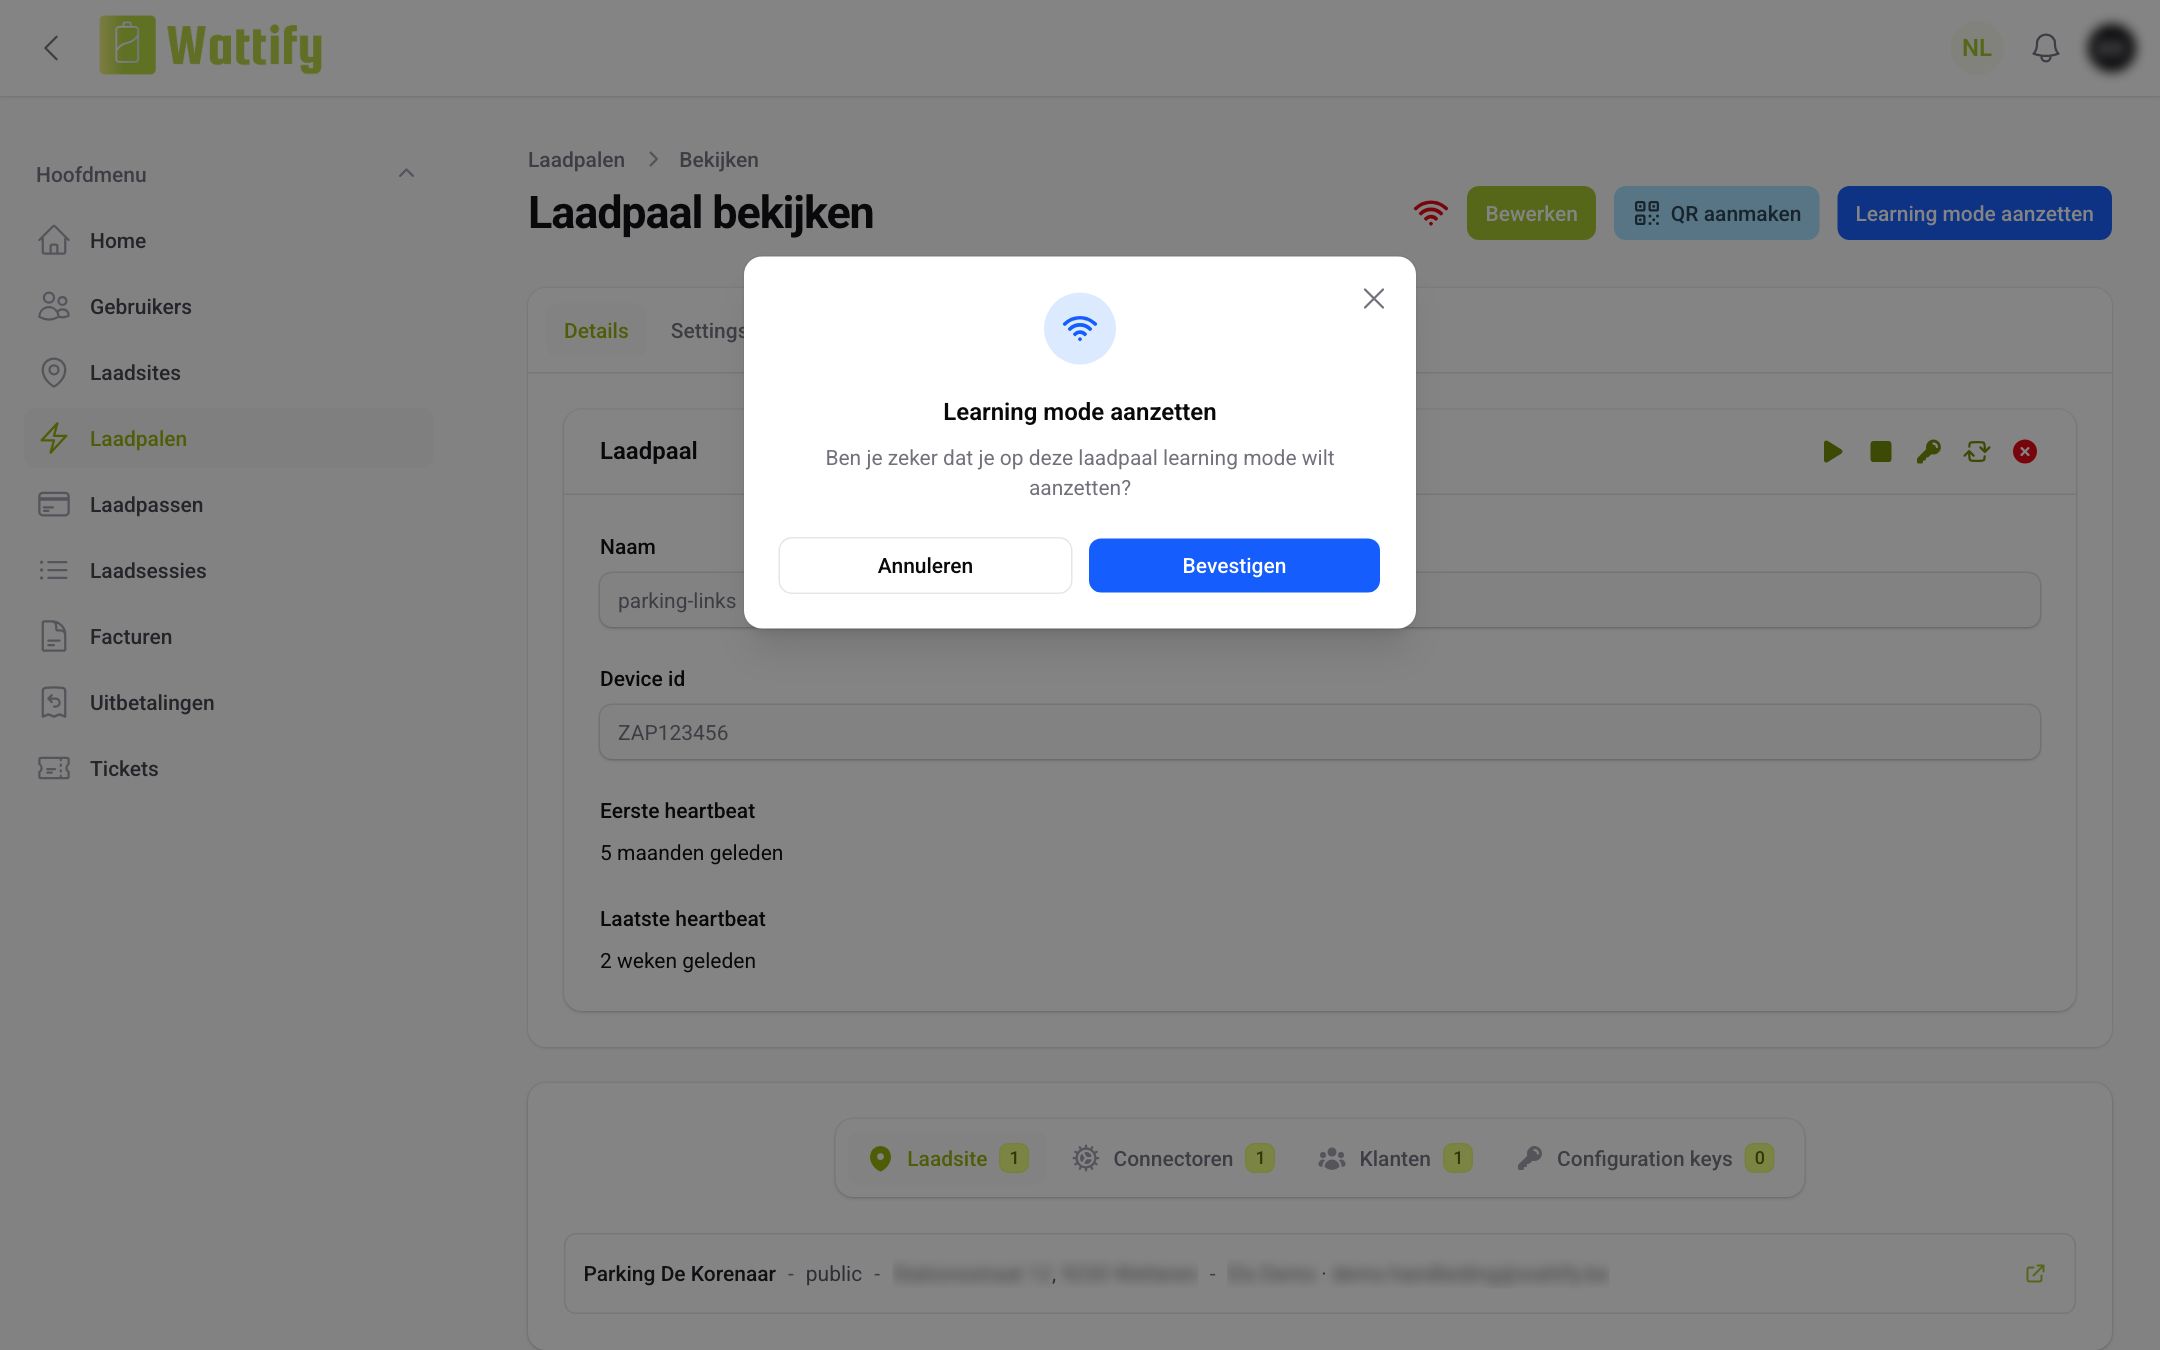
In the portal, go to Charge points and click the charge point. At the top right, click Turning on learning mode, then click Confirm.
Step 2: hold the cards against the charge point
Plug in the car and hold the cards against the charge point's reader one by one. The charge point does not start a charging session when you do this and usually gives no confirmation; that is normal. Every card the charge point reads appears in the portal under Charge cards after a few moments.
Step 3: turn off learning mode
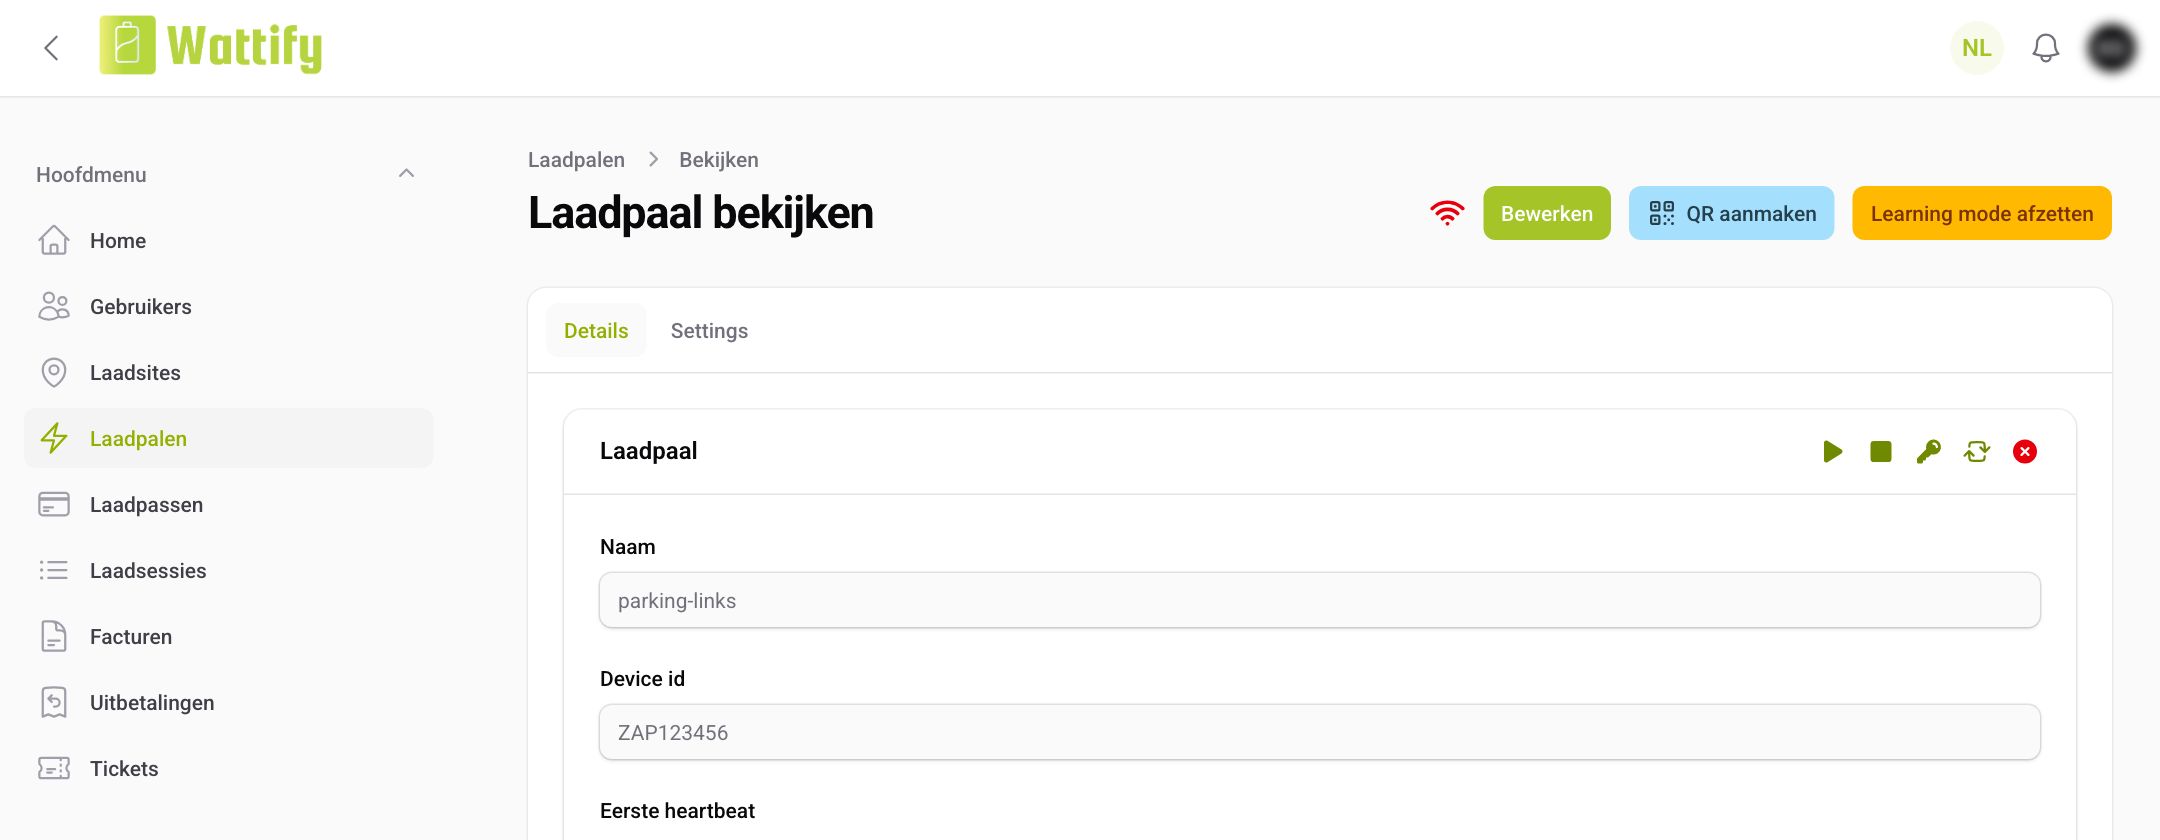
Once all the cards have been read, open the charge point again and click Turning off learning mode. If you forget, learning mode stops by itself after one hour. Still, always turn it off yourself: as long as it is on, nobody can charge at this charge point and every card anyone holds against it is added as a charge card.
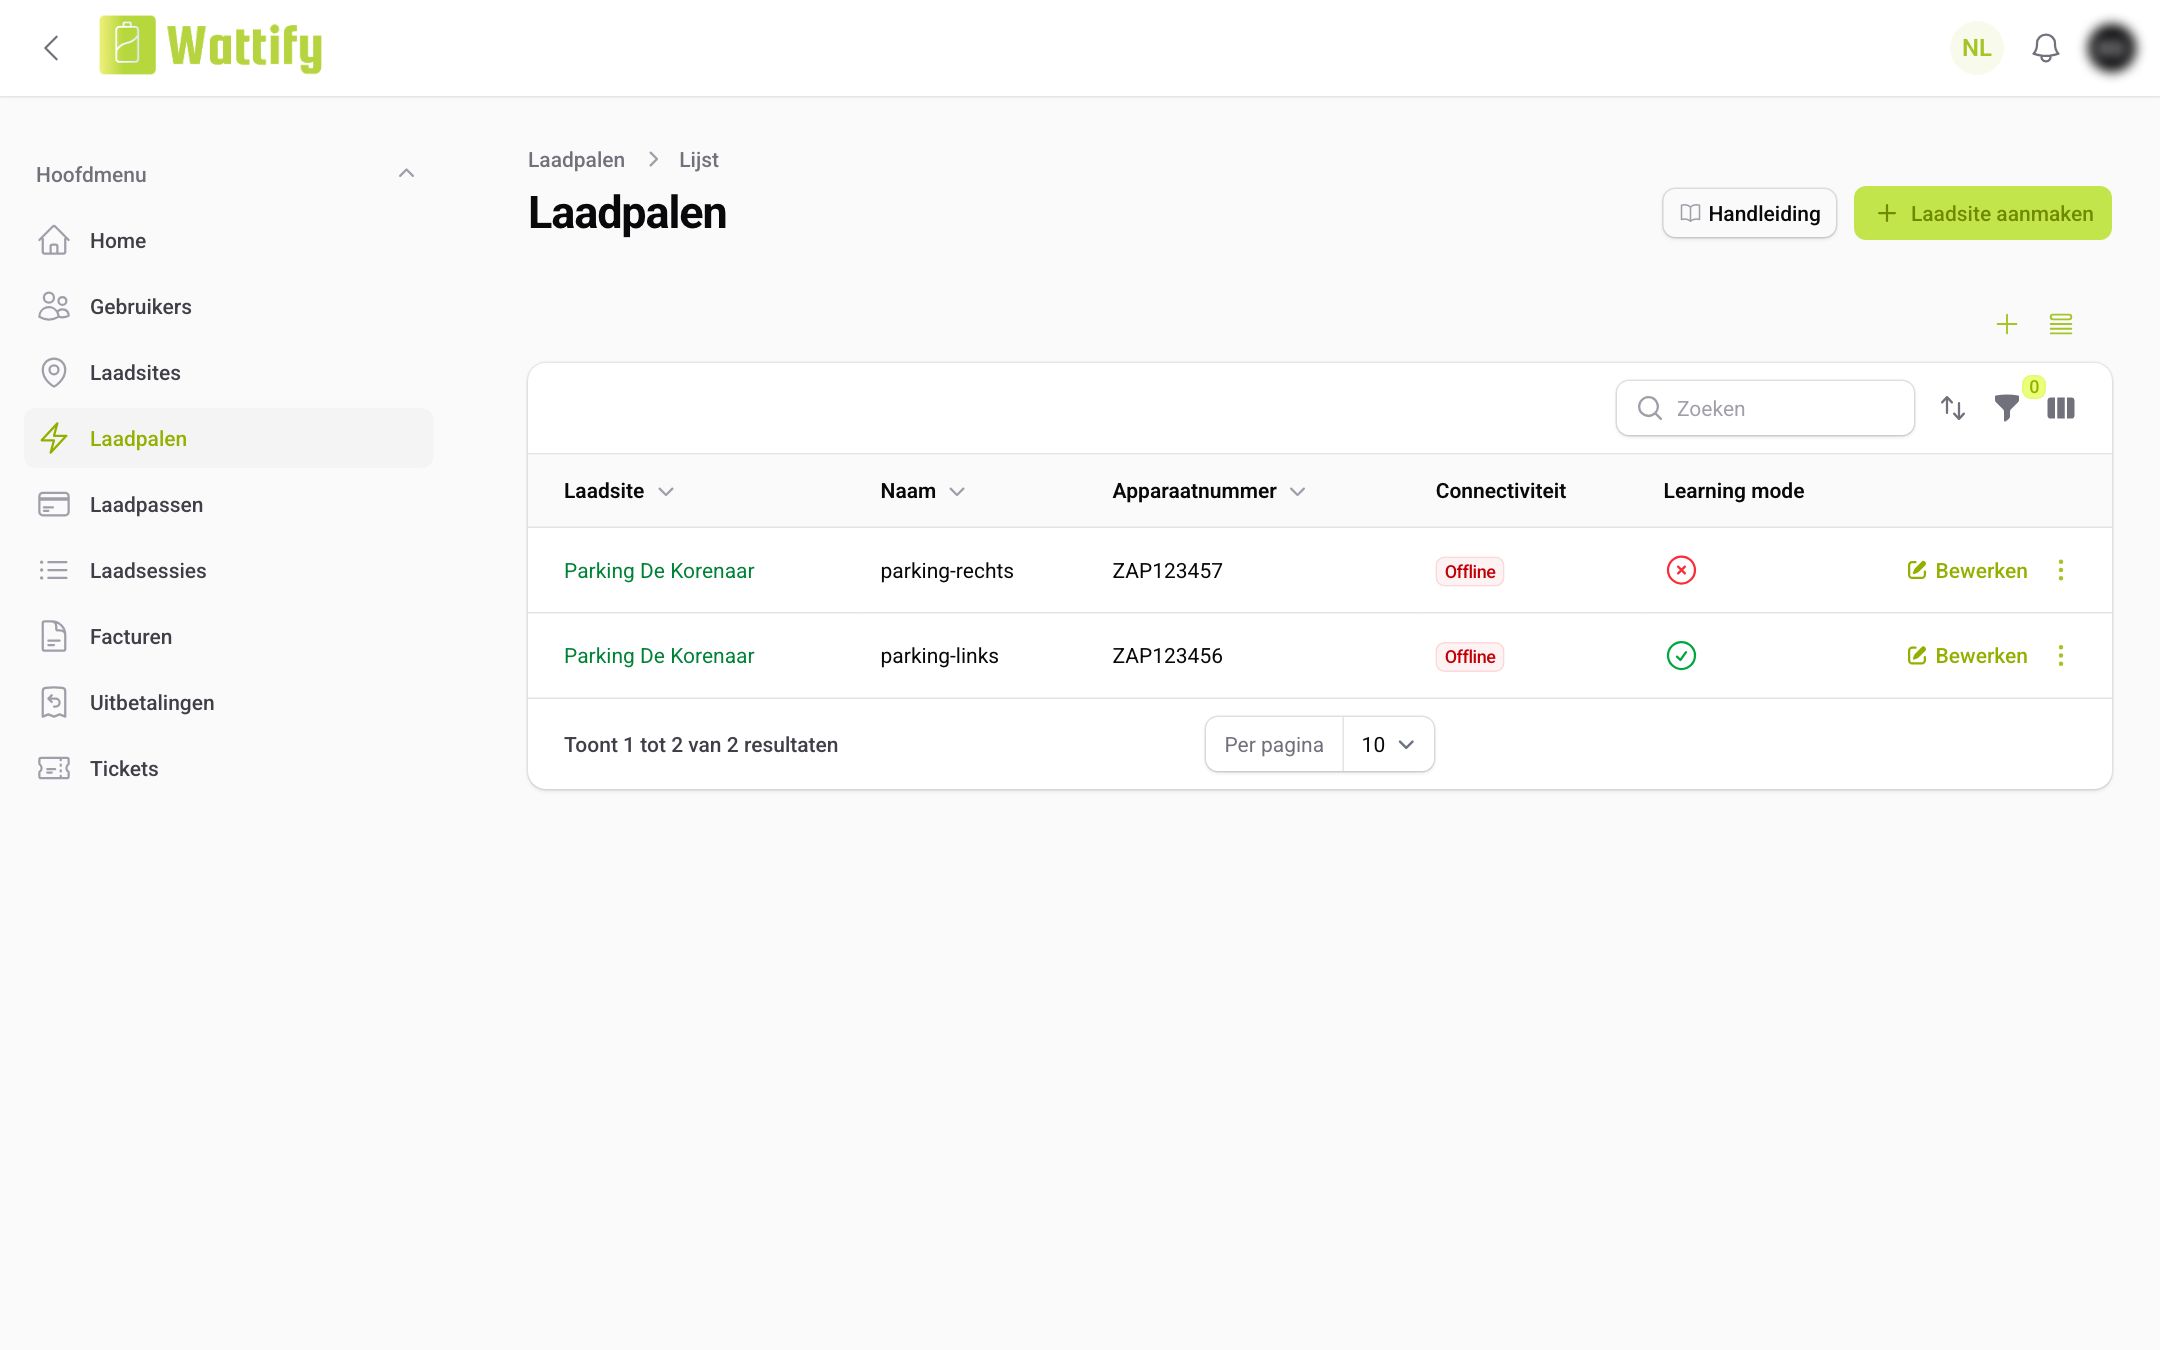
You can see whether learning mode is on for a charge point in the Charge points list. Turn on the Learning mode column via the column menu at the top right of the table: a green tick means the charge point is registering cards.
Step 4: give the cards a recognisable name
Each card that is read in gets an automatic name: the card's code and the time at which the charge point read it, for example 04A2FB1B2C3D - 2026-09-25 10:14:08.
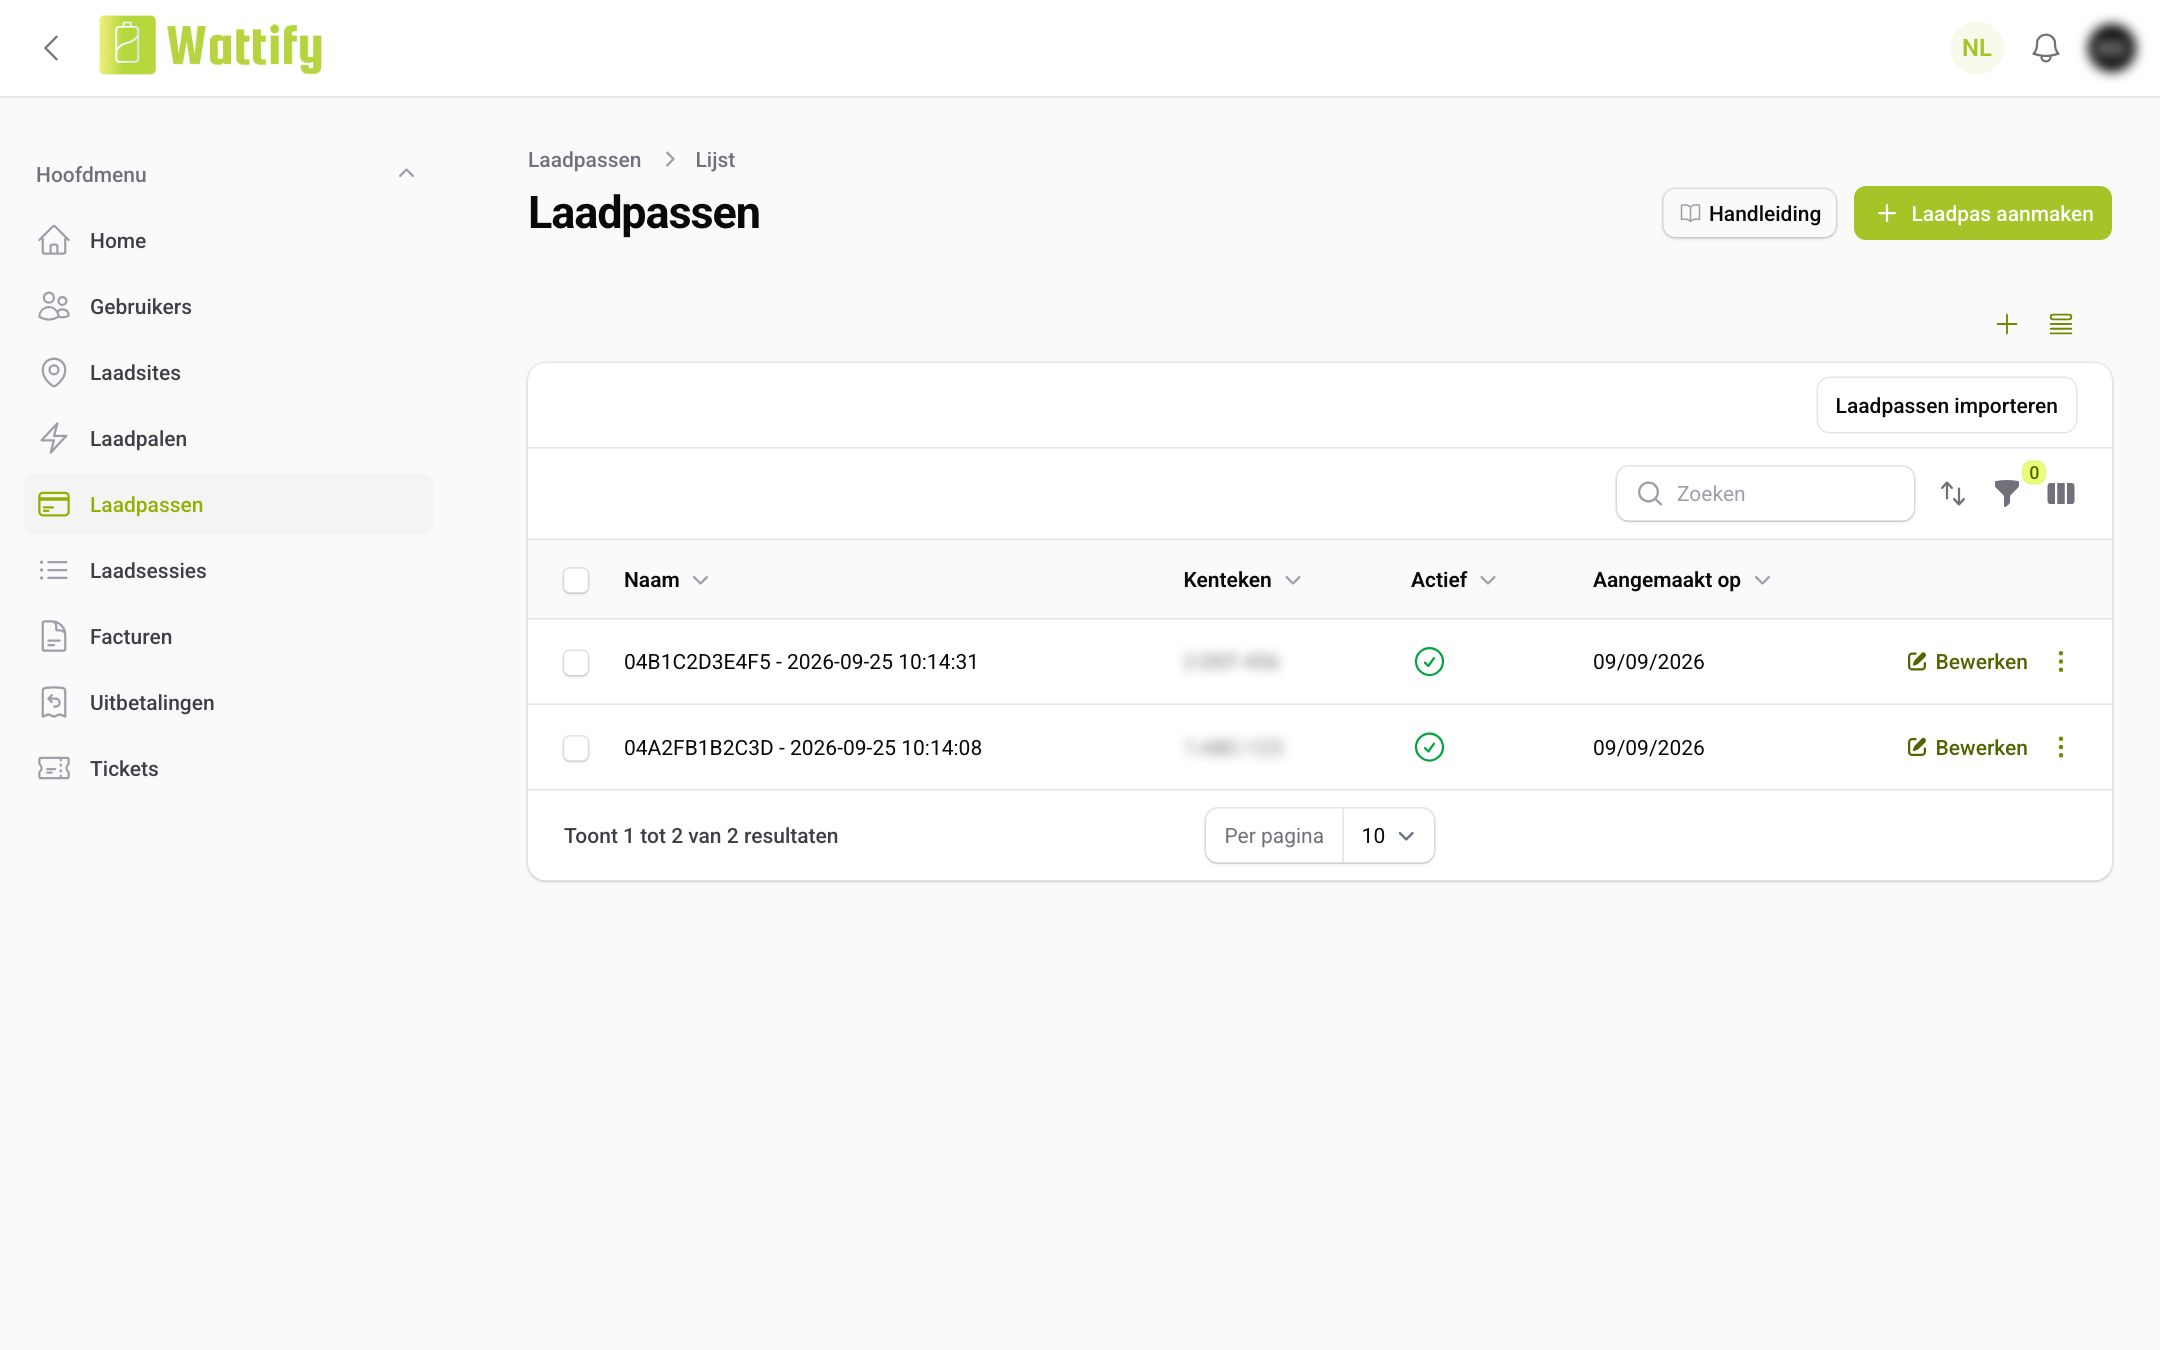
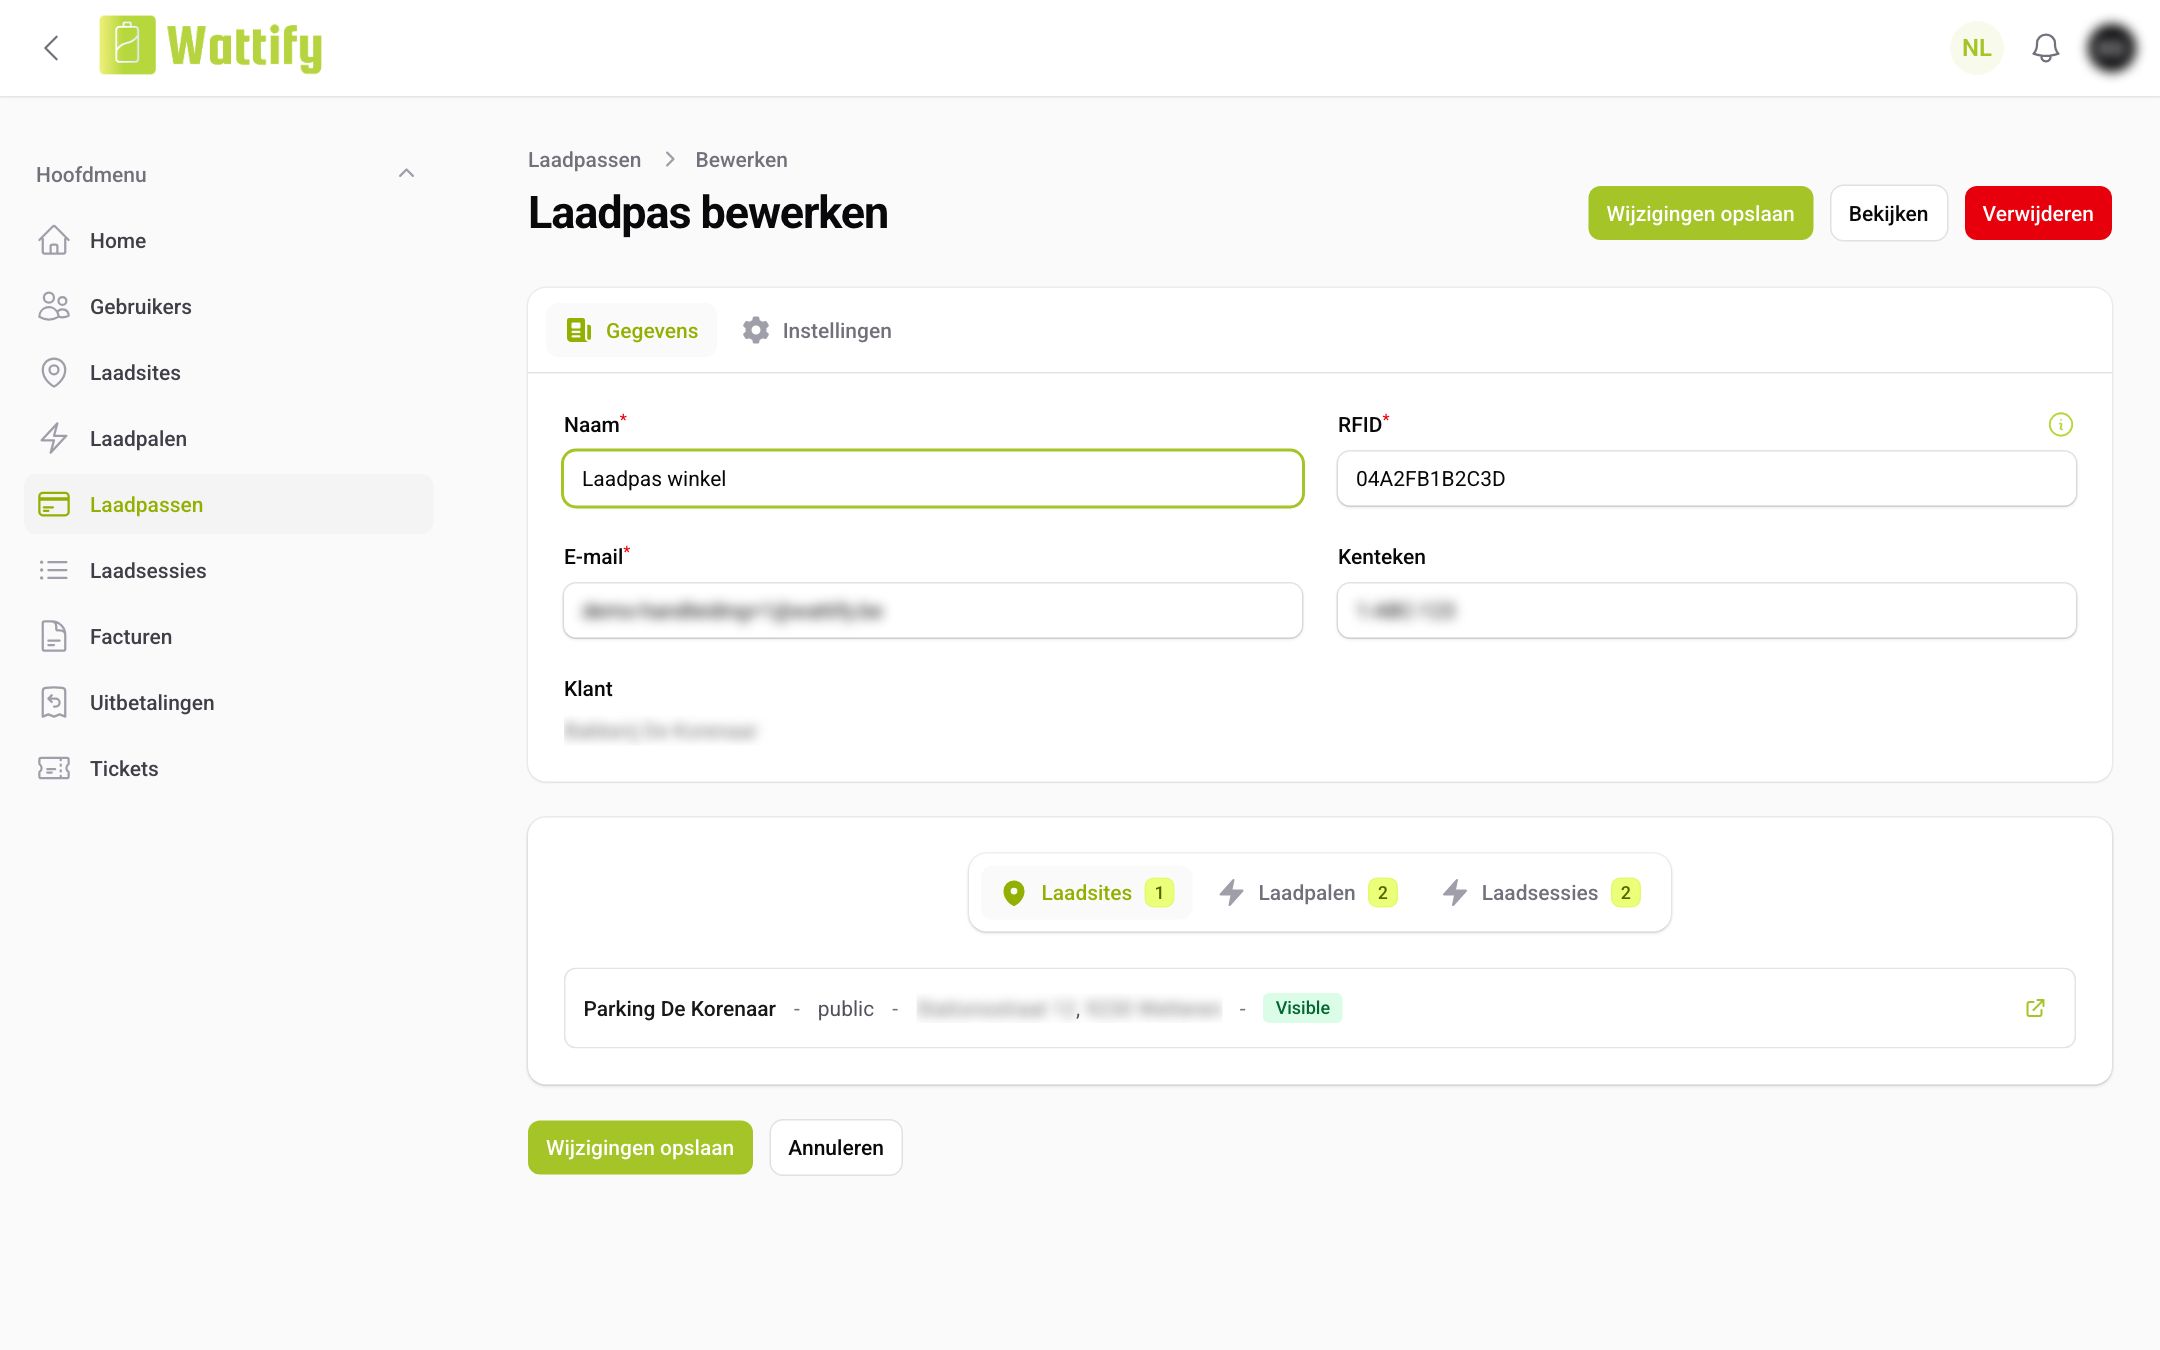
Click Edit next to the card, change the Name to the name of the employee, the resident or the vehicle, and click Save changes. While you are there, also fill in the license plate and the other details.
Good to know
- The cards that are read in end up with the owner of the charge point. With split-billing, that is the employee who owns the charge point: the sessions with those cards are recorded but not billed. In that case, learning mode is meant for the employee's own card or the card of their company car.
- No charge point or car at hand? Read out a card's code with an Android phone and add the card yourself, as described in Learning mode and RFID codes and Adding and managing a charge card.
Related articles
Did this answer your question
Thank you for your feedback
Did not find an answer?
Our team is just an email away and ready to answer your questions